|
Canon today celebrates the 10th anniversary of its iconic EOS 5D series. Originally launched in September 2005, the EOS 5D transformed the DSLR market being the first advanced amateur DSLR to incorporate a full frame CMOS sensor (35.8 x 23.9 mm). Available at a competitive price, the camera enabled enthusiast photographers to utilise the camera’s impressive image quality and creative photographic tools that traditionally had been unique to professional DSLRs with 35mm sensors, contributing to the widespread adoption and success of the full frame sensor cameras. |
||||||
In March 2012, Canon introduced the EOS 5D Mark III, which boasted significant improvements over its predecessors still and video capabilities, as well as enhanced AF precision and a faster maximum continuous shooting speed. Since its launch, the EOS 5D Mark III has garnered high acclaim in the market and, as one of the company’s flagship DSLRs, has come to serve as a driving force for the continued innovation of the EOS series. Most recently, in February 2015, Canon launched the EOS 5DS and EOS 5DS R – transforming the EOS system, with a new breed of ultra-high resolution full-frame DSLRs. Breaking the boundaries of 35mm sensors, the new cameras offer the highest megapixels ever seen in a full frame sensor, an astonishing 50.6 MP. Through the in-house production of all key parts for its EOS series digital cameras, Canon has created a highly robust line-up. Each and every model within the series, including EOS 5D models, is equipped to deliver the very best image performance, thanks to the evolution of innovative technology. To support the diverse needs of photographers, Canon will continue to strengthen its EOS DSLR line-up, which enjoys widespread support from professional and consumer users alike. |
Tag Archives: Glyn Ridgers


5 Tips to Seriously Improve Your Food Photography Techniques
5 Tips to Seriously Improve Your Food Photography Techniques
Food photography is arguably one of the most challenging types of photography out there. Like painting, you start with a blank canvas and build. Layer upon layer, you construct the photo until you reach the perfect balance of reality and art.
Everything in the photo is a decision. Every piece is perfectly placed by the photographer.
Starting out is frustrating, I know. You’re the chef, stylist, and the photographer. Once you reach technical proficiency with the camera, what’s next? I have been, and in a lot of ways still am, in that position. So, how do you improve your food photography beyond the basics? You work on the story.
Whether it is an after-party from the perfect cocktail, or the homemade roasted chicken recipe on the farm, like all photography, you’re telling stories.
Some shoots are more complicated stories than others, and it may sound like a lot of work, but it’s really not. Here are five quick tips you can use to seriously improve your food photography and tell better stories.
#1 – CHOOSE YOUR ANGLE
There are really only a few camera angles in food photography that you see again and again, but you need to make the one you choose, a conscious decision. Where you place the camera will affect the type of story you’re trying to tell.
Think of the food beforehand. Its size, shape, height and what is unique about it. Then place the camera where you think best highlights these qualities. Some dishes look great when you shoot from right in front of the food, and others are best suited when the you are looking down from directly above the table. Take a look at the cupcakes below; their spiralled and delicate toppings really stand out when shot from in front, yet the viewer doesn’t even see the size or shape when photographed from above.

On the other hand, it’s difficult to see all the ingredients and beautiful shape of these salmon tacos when shot from the front, so the shot from above was definitely the way to tell this story.

#2 – SURROUND YOUR HERO
When shooting from the front of the food try to keep a great foreground and background to play with. Use these empty spaces to tell more of a story. Surround your main dish with ingredients and props that relate to the food. Ingredients, sauces, oils, and cooking utensils could indicate how the dish was made.
Tins, jars, herbs, glasses, fabrics and linens could speak about the origin of the dish or the season in which it is served. Placing a few of these in the foreground and background will definitely elevate your story and give it depth.

The props in this image of baklava bring more to the story. The viewer has a sense of place that describes the Arabic origins of this delicious sweet.
#3 – NATURAL IS BEST MODIFIED
Light is king, and acquiring a few tools to help you control it will bring your food photography up to the next level. Poor use of light will ruin your story and immediately turn off your audience. So making sure light doesn’t distract will help out your food photos big time.

Direct natural light can give really hard and defined shadows like beneath the lemon cake on the left. Where those shadows are softened in the image to the right, with a little help from a cheap diffusor.
Placing a diffusor between the window and your table is first on the list. When working with direct sunlight, a diffusor (or even a thin white bed sheet) will greatly improve the quality of light. Softening those hard, dark shadows and bright highlights caused by direct sun light.

Using white and black cards really gives you control over the shadow areas. A white card was used to brighten up that lemon frosting on the left, but if you prefer more contrast than grab a black card and you’ll get an image like the one on the right.
Next up are white and black cards. You can make these yourself using foam core boards, bought at any craft store. Size them to fit your needs, using white cards to bounce light into shadow areas, revealing important details, or black cards to make shadows stronger for more contrast.

Nothing really changes between these two images except for a black card that was used to stop light from hitting the background, making sure the cake was the brightest area of the photograph.
Here is a little secret, when working with natural light. I call it, blocking (sometimes also called “gobos”). Sometimes that pesky natural light will fall on your background or props, causing them to be as bright or even brighter than your subject.
Since the viewer will always look at the brightest spot in your photo first, if it’s not your subject, it can harm your story. You can use your black cards to block light from hitting areas that will compete with your subject. This is also a very important technique for creating darker, low-key styled images.

Here is the final image, with a diffusor softening the window light, a white card to fill in the shadow on the lemon frosting and a black card to block the light on the background.
#4 – OUR OLD FRIENDS LINES AND LAYERS
With all these props and ingredients in the frame, how will we ever get the audience to look at our subject? Well, bring on the trusty techniques of composing with lines and layers. You can use props or ingredients to create lines and layered effects in your images. This is a compositional technique used by photographers to lead their audience’s eyes to the main subject.
You can use various props to create lines. Like this spoon, which forms a nice line, directing the viewer straight to the bowl of baked peaches and ice cream.

Since shooting from above always gets you more graphic images, there are plenty of chances to create some great lines here as well. Some could be quite literal like this cutlery leading to the round of Brie – or more abstract, like how the knife and pomegranate seeds create lines, framing our subject.

Composing images with layers is always a winner. This Brie, shot from the front, is set in the middle of various props and two large out of focus areas. This creates a layered effect, sending your eyes straight to the star.

#5 – HOLD THE COLOUR
This is my personal favorite. I love hunting for props, backgrounds and tableware to put in my images. This little tip was also the first big mistake I was making when I was starting out. It’s great to have props that are colorful, but if you’re not careful that colorful prop can easily upstage your food, and grab all the attention.
When placing items into your food images, try selecting neutral tones, something that makes the food really pop against it. Selecting a neutral background like this black metal tray and baking paper, amplifies the bright red strawberries and rhubarb inside these Crostatas, making them really steal the show.

Please vote for my image…..Thanks
Hi Guys….really appreciate it if you could vote for my image here…just click on the link and if you like my image called Square Meal then vote away….

https://www.facebook.com/Theimagefile?sk=app_244041225639079&app_data=26946-575488
Many Thanks..
Glyn
Are you photography Geek?
I was browsing the web and this made me chuckle..it is from the crazy guys at Digital Rev…this lot put a lot of humour into their videos as well as being able to educate us on how to take great pictures and also give unbiased reviews on the latest products.o check them out at www.digitalrev.com. This clip was was found on http://www.picturecorrect.com which is another great place to visit for all photographers…Enjoy!
The first sign that you may be a photo geek is if you clicked on this link to see if you’re a photo geek. So what’s the difference between being passionate about photography and claiming the title of geek? Well, leave it up to Kai to create a top 10 list of the geekiest photographer traits:
- Form Follow Function Fashion – Basically, you think a lot about photography and very little about your clothes.
- Awkward With the Opposite Sex – You’re terrible at social interactions, especially if it’s with someone you’re attracted too.
- Speaks in Coded Language – Your conversations consist of a lot of talk about f-stops, MTF charts, digital noise, sensor size, etc. Most people won’t know what you’re talking about.
- Only Talks About Cameras, All the Time – Your love of photography might spread a little too far when the only thing you can talk to your friends about is your newest lens or the amazing photo that you captured the other day.
- Bring Inappropriate Gear to Occasions – Maybe you don’t need to bring your TLR when riding a rollercoaster.
- Spend Far Too Long on Online Forums – Whether you’re bragging about your photo or gear, or just talking with other photographers because your friends are tired of listening to you, you may be abusing your photography forum account (in which your username isphotographyloverf/4life)
- Spend Far Too Long at 2nd Hand Shops – If you feel a spark of excitement every time you see a flea market hoping that you will find an old rangefinder camera, you may be a photo geek.
- Try to Outdo Everyone by Getting Exclusive Gear – It doesn’t have to be expensive or new or even functional, but it does have to be unique.
- Treat Your Gear Like Your Baby – This one is iffy. Some photo geeks may treat their photo gear better than their baby.
- Need to Take Photos Even Stuck at Desk – When you feel like you’re wasting time at your office because you’re not taking photos, this could be a sign.

Thanks to
Getting creative with grapes…
An image of simple grapes transformed into a pretty nice piece of wall art…hope you like.

Many thanks
Food images by Glyn Ridgers
Some stunning creative food images by Glyn Ridgers


Sweets by Glyn Ridgers


Rhino Conservation Awards
Hasselblad initiates and sponsors “Rhino Conservation Awards” in the fight against rhino poaching in Africa.
The winners of the first Rhino Conservation Awards recognising those people who dedicate themselves in the fight against rhino poaching in Africa, have been announced and honoured at an event recently held in Pretoria, South Africa.
The annual Rhino Conservation Award has been initiated in 2012 by the Swedish camera manufacturer Hasselblad via its Chairman and CEO, Dr. Larry Hansen and Ms Xiaoyang Yu, founding partner of China New Enterprise Investment, a China focused growth capital fund, with the intention to raise awareness of what is being done in the fight against rhino poaching in South Africa and to recognise role players, who make a significant contribution.
In cooperation with the Game Rangers Association of Africa (GRAA) and the Department of Environmental Affairs of South Africa, the primary objective of the awards programme is to motivate involved role players to keep fighting to ensure the rhino’s survival.
The award ceremony was attended by a cross section of stakeholders with conservation, media and judicial backgrounds and acknowledged awardees in the following five categories: Best Conservation Practitioner; Best Judicial System & Policing; Best Media and Journalism; Best NGO and Best Technology Invention/Application.
Edna Molewa, Minister of Water and Environmental Affairs in South Africa, welcomed the initiatives taken by all stakeholders to partner and support the government in fighting this scourge, acknowledging that government alone can’t overcome this threat to conservation.
Dr. Larry Hansen, who also founded the still ongoing Carl Zeiss Tiger Conservation Award in India fourteen years ago, emphasised in his speech at the award ceremony: “I am delighted with the number and quality of nominations received for this award. All nominees and winners often do selfless, unrecognised work to save a heritage that could be lost forever. Sometimes this happens in the face of physical danger, political opposition and financial constraints. These factors make the contribution of each role player even more worthy of recognition.”
The Award winners are:
Don English – Regional Ranger, Marula South Region, KNP
Adv. Antoinette Ferreira – Senior State Advocate NPA Free State
Jenny Griesel – Marketing Manager, Jacaranda FM
Elise Daffue – Founder of http://www.stoprhinopoaching.com
Dr. Cindy Harper – Geneticist, Onderstpoort Veterinary Genetics Laboratory
South Africa protects around 80% of the world’s total rhino population, and rhino horn is currently exported at a rate that puts the survival of both the black and white rhino in jeopardy.
Posted by Glyn Ridgers
Project Games…..
Project Games is a set of images I am producing to see how creative I can be whilst having fun playing…….HaHa!…Life is fun!……
Hope you like
Glyn
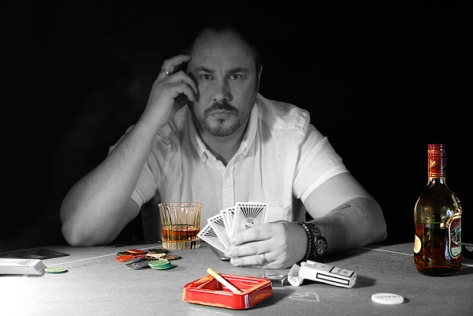

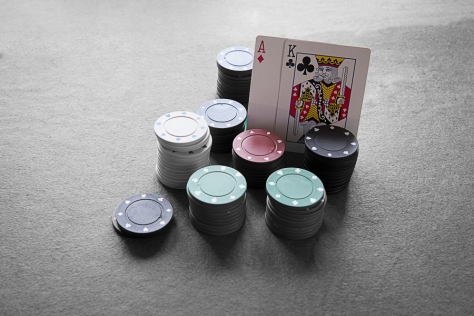
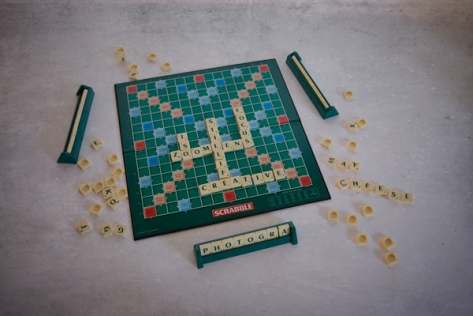
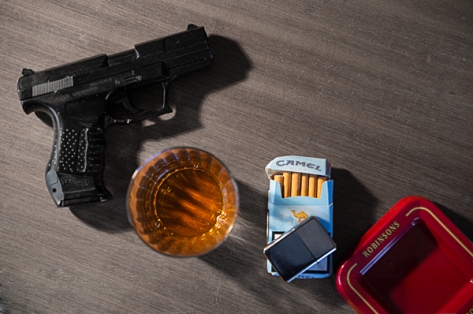
Thanks for looking and I hope you like the collection so far
Typewriter of Thrillers…
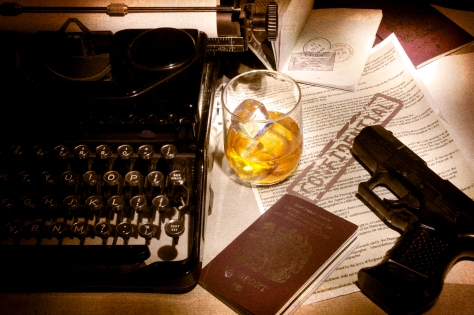
HI folks, Just another image I knocked up whilst being caught up in the excitement of the new James Bond film……
Hope you like..
Glyn
Making an entrance…
Making an entrance can be quite difficult if there is no door to enter through, so lets give the doors some credit and take some pictures to show just how marvellous they are…
I have started this as another project as it is quite interesting how creative we can be and how many incredible opportunities there are out there to make art from a simple door…

This was a door on a cathedral, the door and surround is beautiful however in the original image the background was to powerful so with a simple Gaussian blur layer added then the subject erased through created an almost toyish looking image very similar to what you would get using a tilt shift lens…

I really liked this door as it is interesting enough on its own but with the surrounding textures created by the wall climbing plants and the berries as well as the light made this a great picture.. I shot this using the bracketing technique and then merged three images together to bring out maximum tone and detail…

A forgotten old building where the environment has made it its home presented me with this wonderful door, again bracketed and merged then slightly desaturated to give a nice weathered effect…
Hope you like these images enough for you to start noticing doors of interest near you as they really do make great images.
All the best
Glyn
by Glyn Ridgers
